
In this guide, we’ll walk you through the steps to manage your search terms by reviewing, negating irrelevant search terms, and adding well-performing search terms.
Ampd's keywords are entered into campaigns as "exact match". However, Google uses "exact" loosely and will cast a wider net by automatically matching keywords to similar search terms, meaning search terms can come through that you may not want to bid on.
To keep the net as tight as possible, you will need to review your search terms. If you see a search term that is irrelevant to your campaign, you can negate it to avoid showing your ad on that search term going forward.
You are also able to expand on campaigns by adding search terms based on well-performing keywords. Allowing you to add in new keywords.
Negating Irrelevant Search Terms:
- Check Date Range: Ensure you're viewing data from at least the last 30 days.
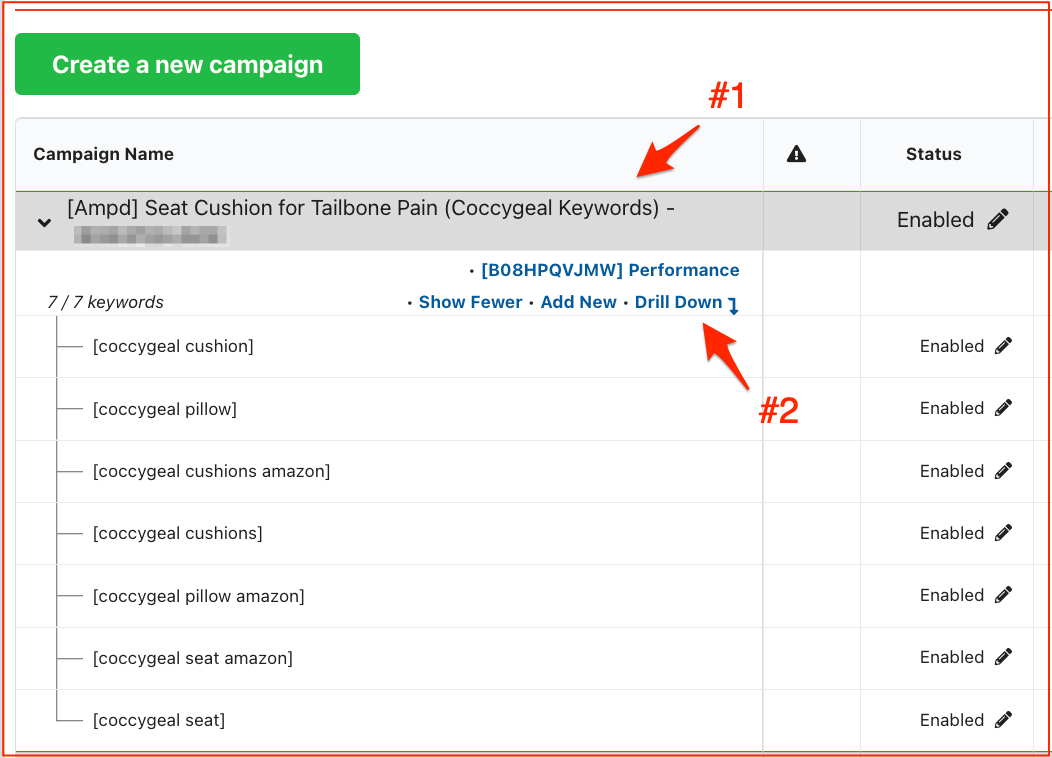
- Navigate to Campaign: Click on the Campaign Name.
- Drill Down: Click "Drill Down" for more details.
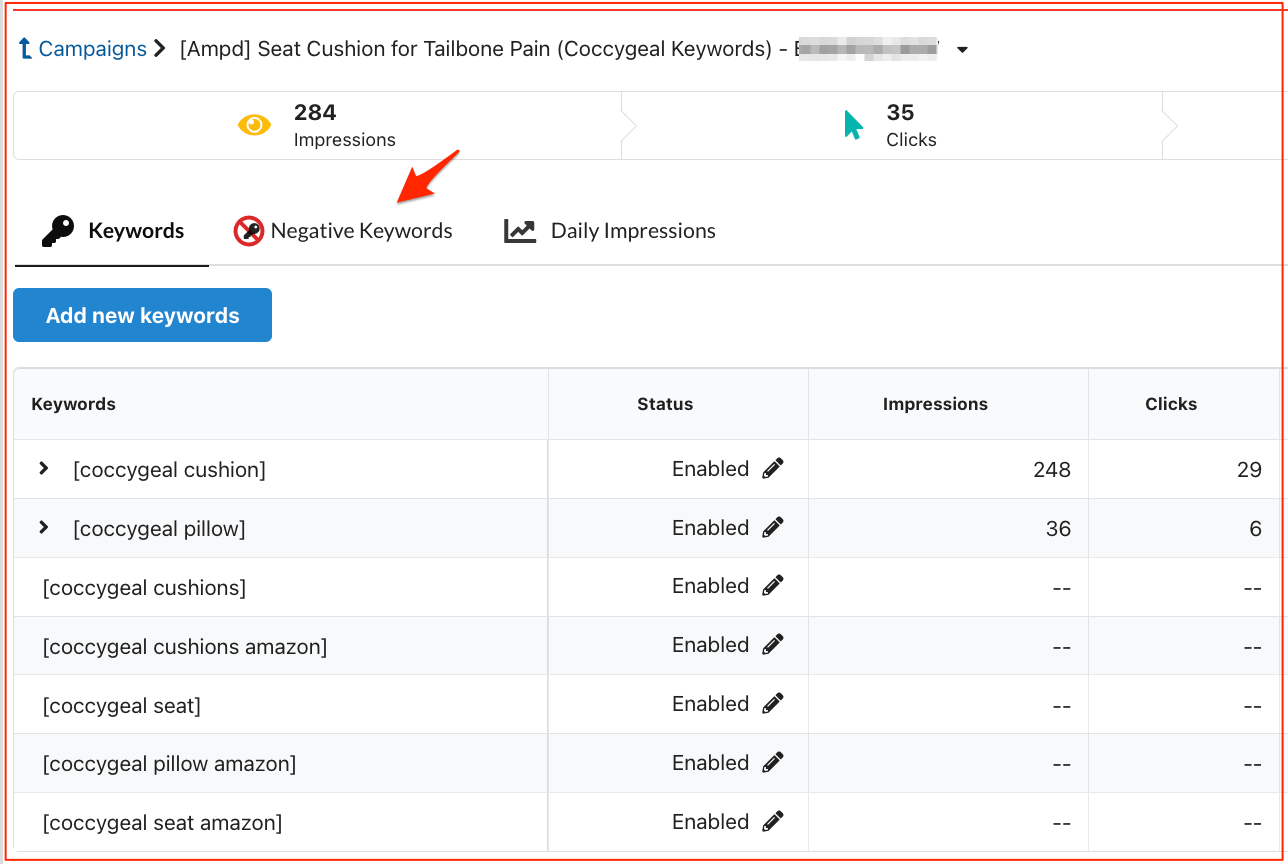
4. Access Negative Keywords: Click "Negative Keywords."
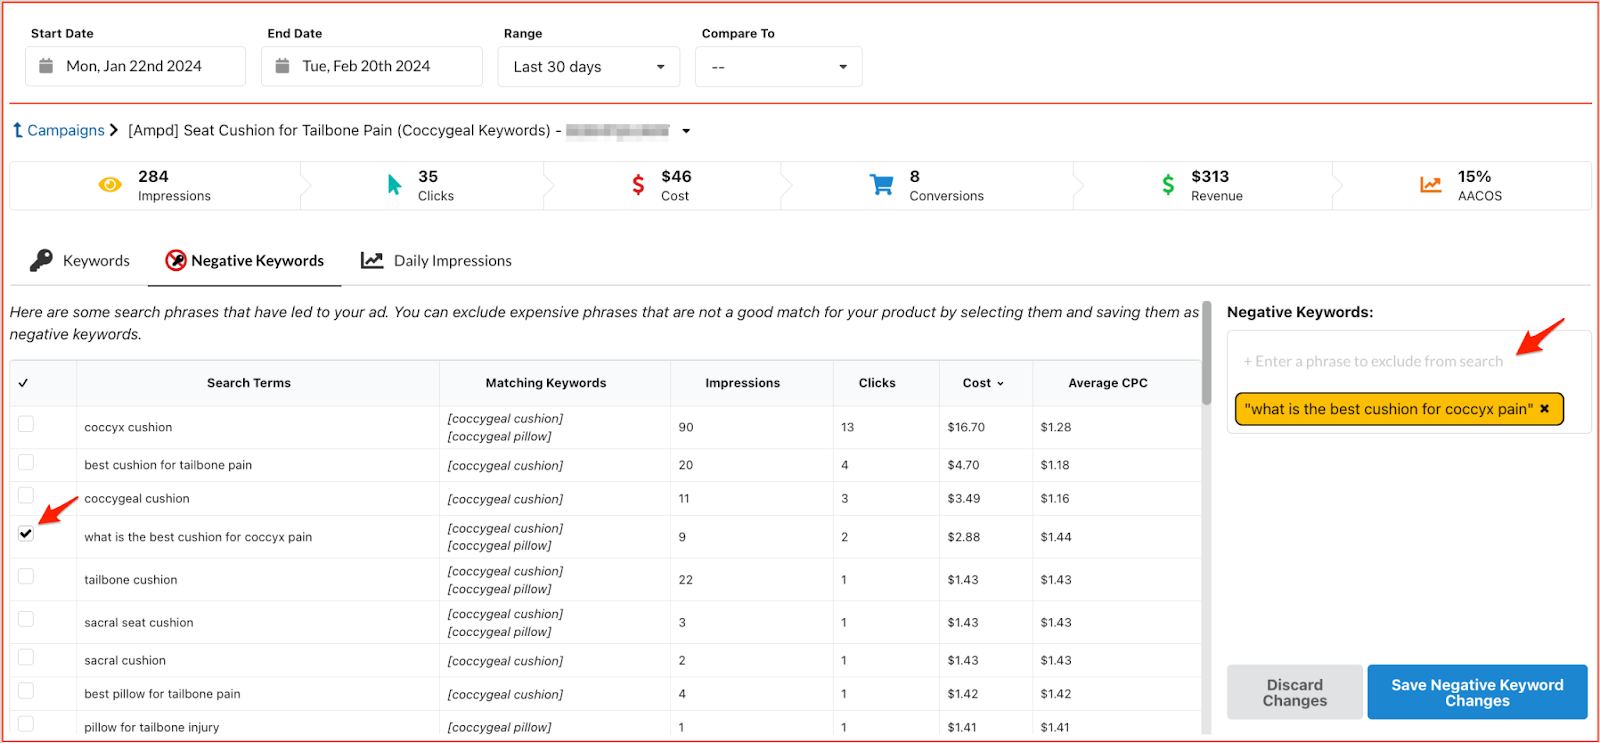
5. Review & Select: Check boxes next to irrelevant search terms.
6. Negate Keywords: Select search terms will be added as negative keywords automatically.
Tips for Negating Search Terms:
- Negate question-based terms like "Who," "What," "When," etc., to allow for you to focus on higher intent keywords.
- Amazon Attribution does not provide search term level conversion data, so focus on negating search terms that are clearly not driving conversions.
Adding High-intent Search Terms as Keywords:
- Click the tab to the left of "negative keywords"
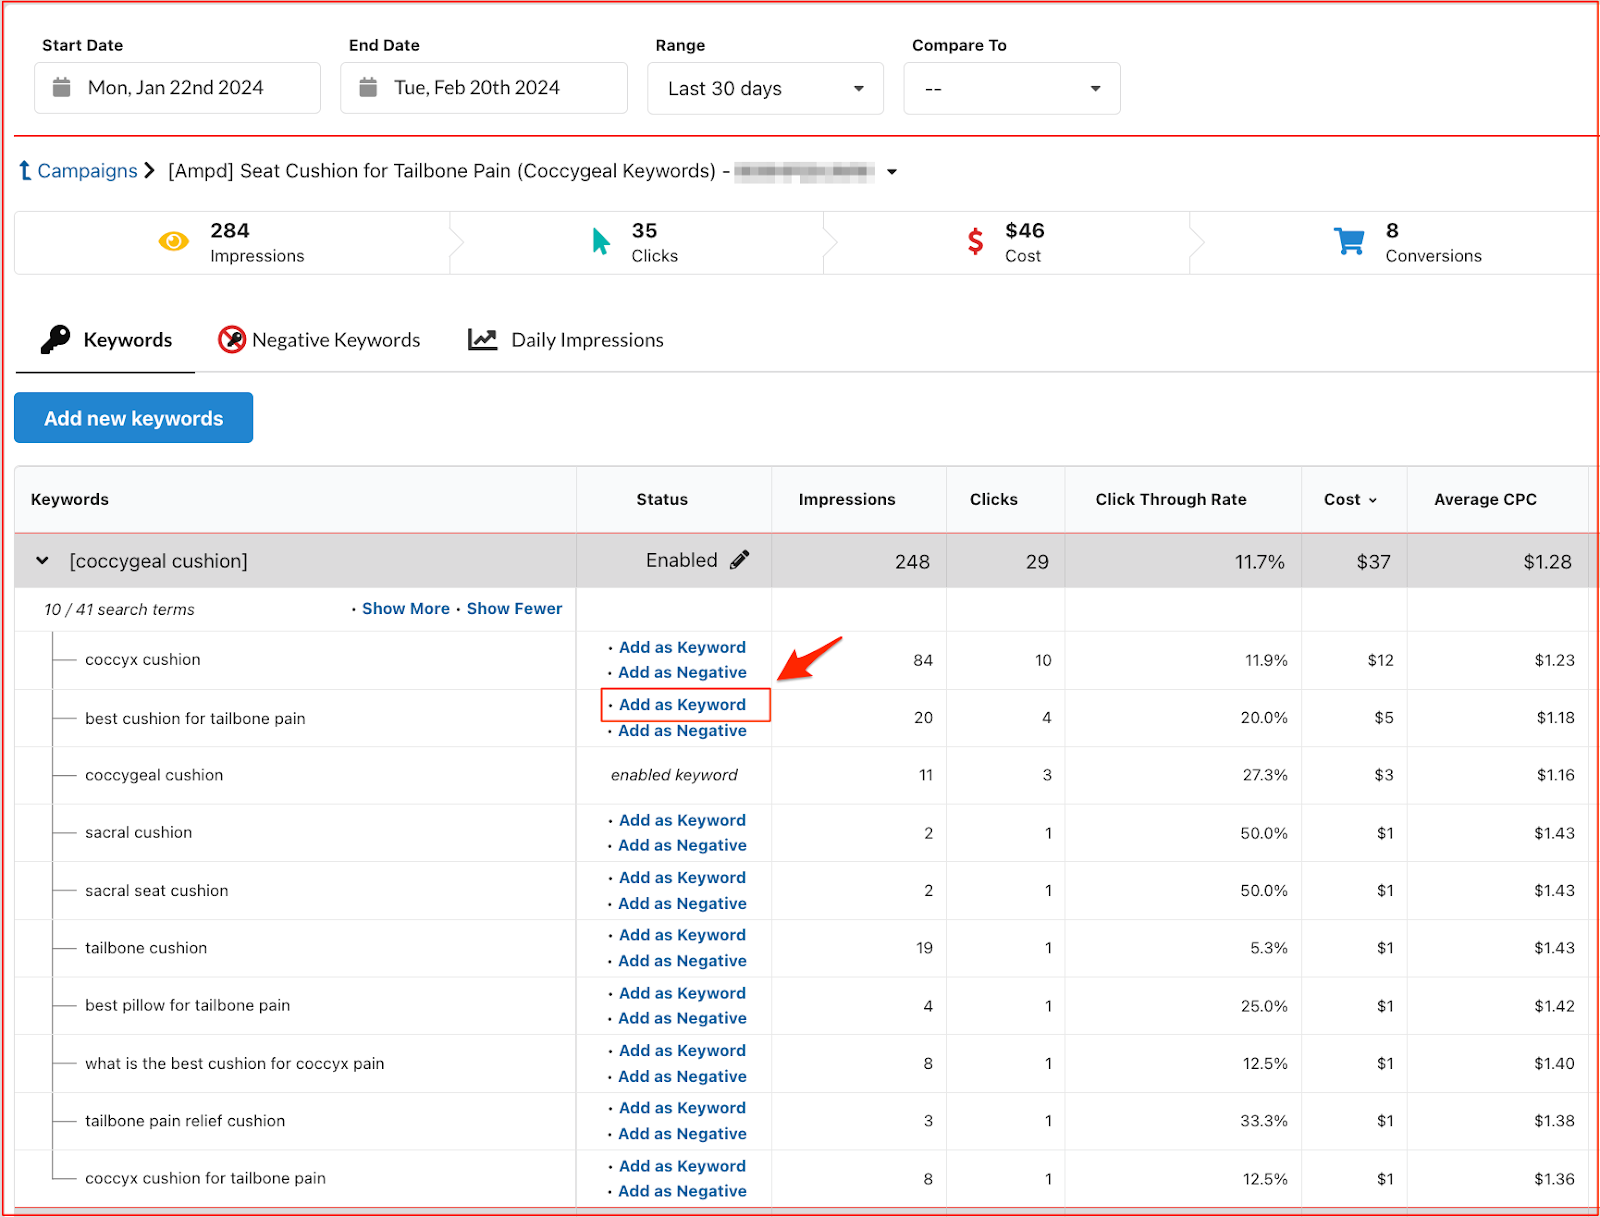
- Expand Keywords: Click on the keyword to view associated search terms.
- Add New Keywords: Click “Add as Keyword” to add in relevant search term as a keyword.
Tips for Adding Keywords:
- Sort by cost to identify high-spending search terms.
- Look for high intent search terms that clearly describe your product